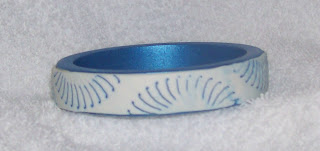
Here is a fun and easy project with clay stamping, it would be "quick" too, except for the drying time of the clay. This sample is fairly simple, but you get the basics now experiment and have some fun with it!
SUPPLIES:
Shimmer Sapphire Glaze
(Earth Safe Finishes) White Clay
(Makins)Rubber Stamp
(Spellbinders-ornaments)VersaMark Clear pigment
(Tsukineko) Wood bangle, foam brush, water spritzer, non stick surface, paper towels/rags, strong adhesive (Misc.)
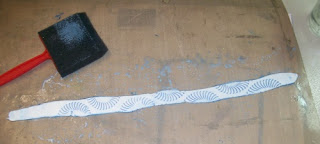
1. Roll clay into a thin strip at least 1-1 1/2" inches longer than bangle circumference.
2. Stamp a design into the clay as deeply as possible without compromising the stability by breaking through the clay. Use a clear pigment ink as a release agent for best results. Let dry for 1-2 hours.
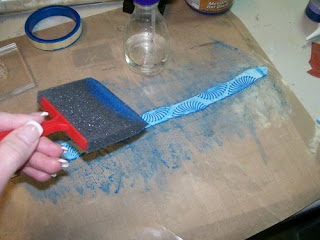
3. Pounce Shimmer Glaze into the depressions of the stamped design. Total coverage of the bracelet is not necessary. Let dry.
4. Apply a light mist of water to the dried glaze and begin to gently brush off the glaze that is not in the depressions of the stamped design. Clean the brush and work surface often. Repeat and apply more spritz as necessary to remove surface glaze until you reach the desired effect. Be careful not to use too much water.
5. Let dry completely. Turn the bracelet over and let dry. It's very important that the clay be completely dry before attaching to the bangle. The clay shrinks as it dries and you don't want it to shrink more AFTER you've trimmed it to fit the bangle.
6. While the clay is drying, paint the bangle with Shimmer Sapphire Glaze, The glaze dries fairly quickly. Apply multiple coats to achieve the desired color depth. Let dry.
7. Attach the dried clay to the wood bracelet with strong adhesive, trim as necessary.


